
My kitchen is the heart of my home. It’s where I’ve spent countless hours cooking meals for my family, baking cookies with the kids, and sharing laugh-filled dinners. And while the countertops and sink often get the most attention, there’s one area that I tend to forget about: under the heavy appliances.
I’ll be the first to admit it—there was a time when I would push the refrigerator or oven around, and I’d think, “Out of sight, out of mind.” But one day, after I finally decided to take a closer look, I realized just how much dust, crumbs, and dirt had gathered under there. It was a hidden mess that was actually affecting the cleanliness of my kitchen. And honestly, I didn’t even realize how much peace of mind I’d get from cleaning those spots.
So, I decided to share my personal approach to cleaning under the appliances. It’s not as daunting as it seems, and it’s something you can easily tackle too. With just a few steps, I was able to make my kitchen feel fresh, clean, and welcoming. Let me walk you through it!
Preparation Steps
Before I start moving things around, let me talk about what I usually use. First, I grab a long-handled duster, a vacuum with a hose attachment, and a cleaning solution. A flashlight is super handy to shine into those dark corners, and gloves are a must to protect my hands. A small brush also helps when I need to reach tight spaces.
Safety is key here. I always make sure to unplug any appliances before I start cleaning. I also move appliances carefully to avoid scratching the floors. If it’s something heavy (like my fridge), I don’t hesitate to ask my husband for help. And don’t forget, it’s important to bend my knees when lifting, so my back doesn’t take the brunt of the weight. I always keep the kids and pets out of the way while I clean—better safe than sorry!
Tools I Use to Clean Under Appliances:
| Tool | Why I Use It |
|---|---|
| Long-handled duster | Reaches tight spots without moving appliances |
| Vacuum hose | Removes deep-set crumbs and dust |
| Vinegar solution | Cuts through grease and deodorizes |
| Flashlight | Helps me spot hidden dirt |
| Protective gloves | Makes next clean-up easier |
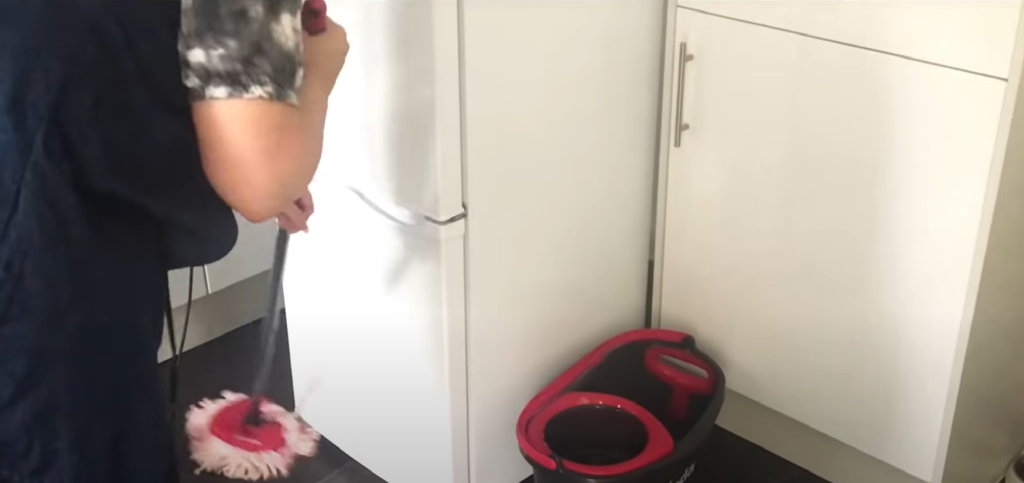
Cleaning Under The Refrigerator
Ah, the refrigerator—the place where crumbs and spills seem to mysteriously hide. I remember the first time I decided to clean under mine, I was honestly a little shocked by how much dust had built up. It didn’t take long, but the results were so rewarding.
First things first—unplugging my refrigerator for safety. Then, I slowly pull it away from the wall. If I’m doing this by myself, I’m careful not to scratch the floor. If it’s too heavy, I definitely ask for a helping hand. I make sure to keep the fridge doors closed while I’m moving it around to prevent anything from falling out.
Next, I grab my vacuum with the hose attachment and carefully clean the back and sides. That’s where most of the dust and dirt like to settle. If I spot any spider webs, I vacuum those up too (trust me, I’m always happy to get rid of them). After that, I give the floor a quick sweep, followed by a mop with warm soapy water. I make sure to dry the area with a towel so I don’t end up with any slippery spots when I slide the fridge back into place.
Cleaning Under The Oven
I used to dread cleaning under my oven, mostly because I always imagined it would be a huge hassle. But once I did it, I was amazed at how much better the kitchen felt. Grease and crumbs love to hide under there, but with a few simple steps, it’s easy to get it looking fresh again.
I start by unplugging the oven. Safety first, as always. Then, I slowly slide it away from the wall. If it’s heavy, I don’t hesitate to ask for help. I’ve learned the hard way that wires can get tangled, so I make sure I’m careful with them. While I’m at it, I look for any dropped food items. It’s always nice to pick those up.
For cleaning, I use a soft cloth or sponge with warm, soapy water. I scrub gently, especially around any sticky or greasy spots. If grease is being stubborn (it happens!), I use a special cleaner and follow the instructions on the bottle. Once I’ve scrubbed the area, I rinse it off with clean water and dry it with a towel.
If there are crumbs or dust on the floor, I give them a quick sweep. If the floor feels sticky, I mop it with a mild cleaner and dry it well to avoid slips.

Cleaning Under The Dishwasher
The dishwasher—something I use every day, yet it’s easy to forget about cleaning under it. For me, it was one of those places I didn’t realize needed attention until I started noticing a musty smell in the kitchen. That’s when I figured out that moisture under the dishwasher is the perfect breeding ground for mold. So, I made it a priority to clean that area regularly.
I start by gently pulling the dishwasher out. I’m careful not to damage the floor. A flashlight helps me spot any hidden crumbs or dirt in those dark spaces. I like to use a long, thin brush to get into tight spots. And I don’t forget about the floor—water can leave spots that are hard to remove.
To clean up any residue, I add a bit of vinegar. It works wonders to break down buildup. Afterward, I wipe everything down with a dry cloth to remove any moisture. It’s important to keep this area dry because mold loves damp spaces. If there’s any sign of leaks, I fix them right away.
Handling Smaller Appliances
I don’t forget about the smaller appliances like the microwave, toaster, and coffee maker. Crumbs and spills often find their way under these, so I make it a point to clean around them every few weeks. For the toaster and microwave, it’s a simple job of moving them and wiping underneath with a damp cloth.
For the coffee maker or blender, I always unplug them and remove any removable parts to clean separately. Then, I give the area underneath a good wipe down with a cloth or paper towel. It’s a quick job, but it really helps keep the kitchen feeling fresh.
How to Clean Behind Kitchen Appliances
Cleaning behind kitchen appliances can seem like an intimidating task, but it’s not as hard as it sounds. A few months ago, I realized that behind my fridge and stove was the perfect hiding place for dust, crumbs, and even some random items that had fallen behind. That’s when I decided to tackle this task—and it turned out to be a surprisingly quick win.
I start by carefully moving the appliance away from the wall. I use a vacuum with a hose attachment to get rid of any dust and debris. I’m always amazed at how much dirt collects back there! If there are any sticky spots, I wipe them away with a damp cloth. I always use a mild cleaning solution to keep things fresh without harsh chemicals.
Once I’m done, I move the appliance back carefully. I make sure everything is dry and clean before sliding it into place so there’s no risk of slipping.
How to Clean Under a Sink or Smaller Areas
Sometimes, I overlook smaller spaces like the area under the kitchen sink or behind the garbage can. These places tend to gather dust, crumbs, and even spills that I forget about. In my experience, it’s those little areas that can make the biggest difference when they’re clean.
I take a moment each month to pull out everything from under the sink, giving it a good wipe with a damp cloth. If I see any spills or leaks, I make sure to clean them up immediately, since water can cause mold or odors. For tight spots, I use a small brush or even an old toothbrush to scrub away any dirt.
The same goes for behind the trash can. I know it’s not the most glamorous spot to clean, but it’s important! I don’t have to do this every week, but it’s a good idea to check in every couple of months.
Maintaining a Clean Kitchen Environment: My Tips
Once I started cleaning under my appliances, I realized how much better my kitchen felt overall. Not only did everything look cleaner, but it also made me feel better knowing that my family was spending time in a fresh, healthy space.
A clean kitchen just feels more inviting. And when I add in the sense of accomplishment after a good cleaning session? It’s hard not to feel proud of my hard work.
Here are a few maintenance tips that I’ve found helpful in keeping things in check:
-
Set a Monthly Cleaning Schedule: I mark it in my calendar or set a reminder on my phone. Cleaning under appliances once a month has become a simple routine in our house, and it doesn’t take up too much time.
-
Use Protective Liners: I mentioned this earlier, but it’s a game-changer. Liners catch crumbs and spills before they have a chance to settle under appliances, making cleaning a breeze.
-
Involve the Family: If you have kids, get them involved! I’ve found that my children love helping me with little tasks like vacuuming or wiping down surfaces. It’s a great way to teach them the importance of cleanliness while spending time together.
Frequently Asked Questions
-
How do I clean under kitchen appliances?
I Move appliances gently to access the area underneath. I Use a vacuum or broom to remove dust, followed by a damp cloth or mop for a deeper clean. I Always unplug appliances before moving them. -
How do I clean under a stove without moving it?
I Use a long, thin duster or vacuum with a crevice tool to reach under the stove. For deeper cleaning, I attach a microfiber cloth to a broom handle.
-
How do I clean under kitchen appliances without moving them?
If I’m trying to clean under an appliance that’s too heavy to move, I use a long, thin duster or a vacuum attachment with a crevice tool. These tools help me reach tight spots without needing to move the appliance. For a more thorough clean, I might need to ask for help to shift the appliance temporarily. -
What if there are stubborn grease stains under the oven?
I recommend using a special grease cleaner for those tough spots. I make sure to follow the instructions on the cleaner for the best results. Sometimes, a little extra elbow grease (pun intended!) and patience will get things spotless.
Conclusion
Cleaning under kitchen appliances doesn’t have to be a big, scary task. It’s something that’s easy to do, especially when I break it down into small, manageable steps. Once I started, I felt so much better knowing that every corner of my kitchen was clean and fresh.
It’s not just about making my kitchen look great; it’s about creating a space that’s healthier and more enjoyable for my family. I’ve made it a monthly habit, and now it only takes me a few minutes. Plus, it’s become a great way to reset the space and start fresh, especially after a busy week of cooking and entertaining.
Like me, you may tackle those hidden spots under your appliances and see just how much cleaner and fresher your kitchen can feel. Your kitchen will thank you, and so will your family. A little effort goes a long way in maintaining a healthy, welcoming home.